This is the core of the equipment movement control of the program. It is where you will process all the work being completed in the Warehouse by documenting what equipment is being prepped, either by quantity or by barcode.
The screen is organized into two distinct areas.
The top of the upper grid includes filters to select what information is being displayed and shows all jobs, equipment lists, subhires and warehouse transfers as seen by a particular warehouse over a given date range.

There are three Operations Pages:
| • | Pending - displays all the jobs that contain equipment lists which must be processed today and ahead |
| • | Overlooked - displays all the jobs that contain equipment lists which are to be processed out, but have not yet been completed. |
| • | Overdue- displays all the jobs that contain equipment lists which are due to be returned and the date and time has passed. |
The Period Filter(List Dates) has two main functions when enabled.
| 1. | Firstly to limit the jobs by date range. The starting date is set by the drop down date selector and the period being displayed is set as one day (D) two or three days (DD or DDD) or one week (W). |
| 2. | The next drop down box adds extra filtering on the display. |
| • | Out(Prep/Disp) Only filters to only show equipment going out in the active date period and will not show any jobs that are out throughout the entire period. |
| • | Back(Ret/Chk in) Only shows jobs that are coming back in the active date period and will not show any jobs that are out throughout the entire period |
| • | Out or Back Only shows jobs going out or back during the active date period - and will not show any jobs that are out throughout the entire period |
| • | All except completed shows jobs that are going out or coming back or are out through the entire period except for jobs that have been completed (all out and return processes completed. |
| • | All including Completed shows any jobs that cross the active time period whether all transactions have been completed or not |
The View Buttons allow you to display in the middle grid either all the Jobs that contain equipment lists which need to be processed during the period filter. A job can contain many equipment lists, so in this view, only the Job Information will appear. However, if toggled to equipment list view, all of the equipment lists in that period filter will appear in the middle grid.
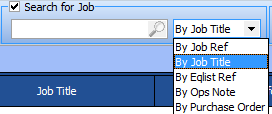
The Search for Job setting will disable the Period Filter, and only allow you to select all the information related to 1 job. The search function is controlled by the field selection menu and you can search for a job by:

The Warehouse Selection will display all jobs which contain equipment lists which must be processed by that warehouse.
The Actions Panel allows the user to collapse or expand tree views in either the upper grid, the lower grid or both. The Refresh button allows the user to update information presented in the Advanced Operations Window and you can use the F5 Key on your keyboard to activate a refresh.
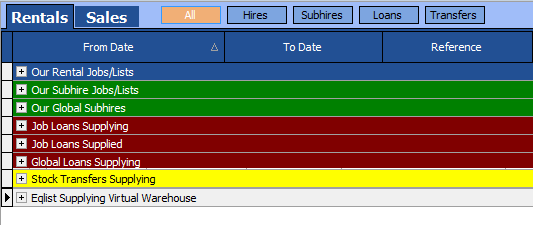
The Rentals tab and the Sales tab delineates the equipment lists that are rental class lists and sales class lists. A job may contain both rental lists and sales lists.
Located to the right of these tabs, you may filter your lists to display just Hires (Rentals), Subhires, Warehouse Loans or Warehouse Transfers.

The Activity Display (upper)

The Traffic Lights of each job show the progress of the order by operations indicated in the 4 columns of
| 1. | Prep |
| 2. | Dispatch |
| 3. | Return |
| 4. | Check In |
| • | Green Indicates the Step is complete |
| • | Yellow indicates the Step is in progress |
| • | Red indicates that no activity has yet started |
The goal of your job is to change all lights to green which will indicate the job has operationally completed. Here you can see that we have 2 jobs that have completed the Prep Process (N-J737 & N-J526). while N-J694 is in prepping progress while N-J653 has yet to begin prepping equipment. Located in the furthest right column is a folder button which allows you to open that specific job.
The Job you select in the upper grid determines what data will appear below in the lower grid.
The Activity Display (Lower)
The lower grid shows the details of whichever row (job or equipment list) is selected in the top window grouped as prep bays where one or more equipment lists can be grouped to be prepped. In the example below, the screenshots for for a Rental.
It comprises a sending out tab:

Here we can see N-J737EQ1 is being prepped on 3 prep notes
| • | one for stock from the local warehouse |
| • | one for subhired equipment |
| • | one for equipment brought in from another warehouse. |
on the dispatch sub tab we can see the dispatch note which is fed equipment from the prep notes of all the equipment lists in this Prep Bay.

When the equipment reteurns, it is processed on the same form, only we will use the coming back tab

We can see that the equipment was returned on returns note RTN1714 and checked back into stock on check in note CHK1715.