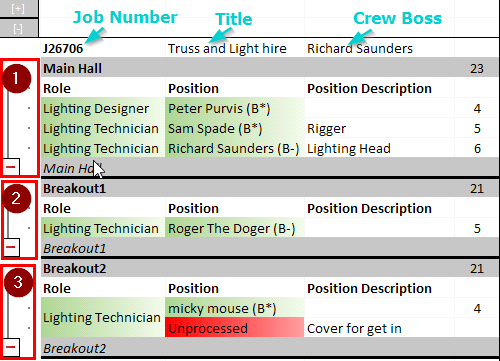
So looking at the screen, horizontally it is divided into areas – typically this would be where there are several different areas on site – or you wanted to keep the Audio crew , Lighting and AV crew separate – not a bad idea sometimes!.
So on screen you can see the three areas on this job labelled 1,2 and 3 corresponding to the main hall, and the two breakout rooms

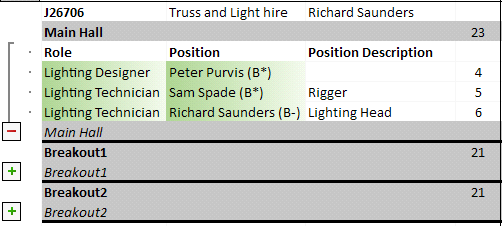
You can minimize areas when you are not using them by using the – and + buttons

On this part of the screen are
the roles requested like – Lighting Designer, Lighting technician
the position – Who is booked ( if booked on the job)
the position Description – an optional field to describe the position in more detail.
The roles and positions are colour coded – so a red role means the role has not yet been defined.
A red position indicates that no one specific has been booked for this role yet.
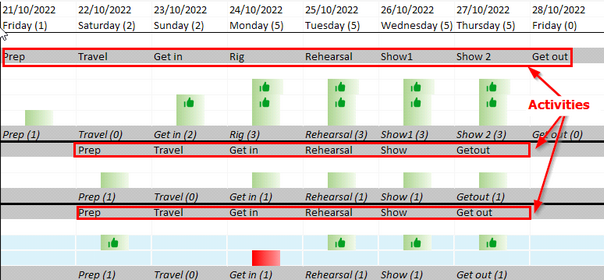
Moving to the right we see the area for defining what is happening on a particular day and what shifts are on those days.
So the first new concept to understand is the grey lines which represent ‘Activities’

The important thing to remember is these are not ‘names to give a day’ but are activities in their own right – the shifts under an activity belong to that activity – so if there is a break between show day 1 and show day 2 introduced by the client – you can move the show2 day to the next day and the shifts under it will follow it.
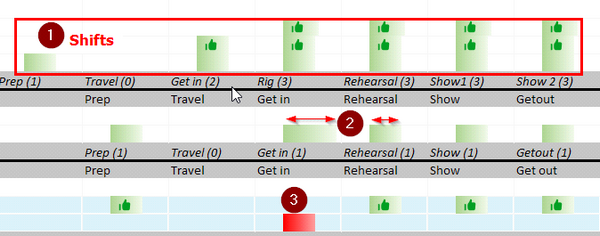
So looking at the shifts

| 1. | Shows a group of shifts for an area. |
2. the size of the shift represents the position in the day and the length of the shift – so we can see that the get in shift is going to be longer than the rehearsal shift.
3. The Shifts are colour coded – Green means it has been booked to a person in that position. Red means the position has no been booked and the green thumbs up means we have raised a purchase order to the crew member.
Putting the above together gives us the basics of the display.
