


|
Creating a New Report
|


|
| Step 1. | Create a new folder |
|
|
| Step 2. | Click on the Data Tab of the Designer as first of all we need to add the list of tables that we need to the report. From the menu select File | New and in the dialog that opens, select the Query Wizard option. The new dialog that appears allows you to pick the tables that we need for this report. Before taking this any further, let us consider what information we would like to see in this report so that we can build up a list of tables that are need:
|
|
|
|
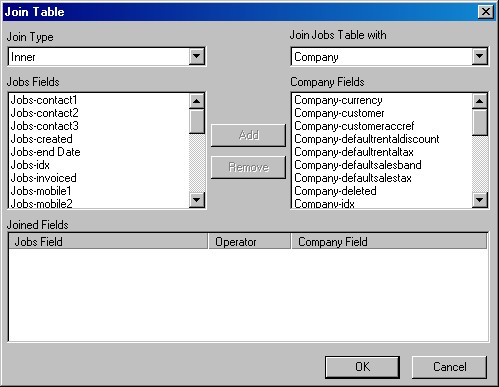
| Only three database tables are required. First, select Company and Jobs from the Wizard Dialog. Immediately you are taken to a Table Join Dialog, which requires some explanation.
|
|
|
|
|
|
| At the bottom is a table of all the linked fields; the Wizard might well add some for you and in all likelihood these will be wrong, so double-click on each one in turn to remove them from the list. At the top of form we see that "Inner Join is selected. This means that only records that match on the Join Field will be selected from both tables, which is fine for this report. Now we need to specify how the tables will be joined: in the list of Jobs Fields select Jobs-xCustomer; in the list of Company Fields select Company-idx.
|

|
|
|
| Now click the Add button to perform the join and click OK on the dialog.
|
|
|
| Back in the Wizard Dialog we now want to add the User table, so do this and clear the default Joined Fields as before. Now we have to specify which table to join User with (before there was only one other table available, now there are two) so below the label "Join User table with" select the Jobs table if it is not already there. Again we need to specify how the tables will be joined: in the list of User Fields select User-idx; in the list of Jobs Fields select Jobs-xUser. Click the Add button to perform the join and click OK on the dialog.
|
|
|
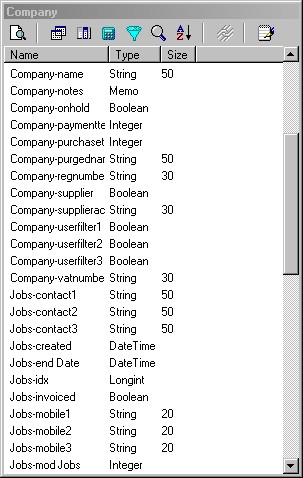
| When you are returned to the Query Wizard click Next, select All Fields and then Finish. The remaining steps of the Wizard are not necessary at this point.
|
|
|
|
|
|
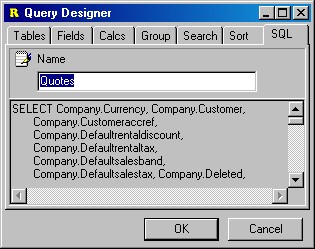
| This lists all the fields that the report will retrieve; at the top of this form there is toolbar with buttons that allow you to add more tables, select more fields, group data, and even preview the actual data for the report in a virtual table. This Data View is given the name of the first table you added, which may confuse you a little. To rename the window, click on the last icon on the toolbar (WordPad icon). Name it Quotes.
|
|
|
|
|
|
| Note: this page reveals all the SQL code which is created each time you modify the Data View. There is an option to be able to change this code manually, something that is very unwise to do.
|
|
|
| Step 3. | Now, go straight to the Design Tab and start adding fields to the report. To a large degree you can free play here with what you want, adding a title text label, print date field etc to the Page Header, but the key fields that we want to add to the Details Section are:
|
|
|
| Close up the Details Section so its only one line and tidy up the layout.
|
|
|

|
|
|
| Then you can preview your report, which at this stage is displaying all jobs in the database.
|
|
|
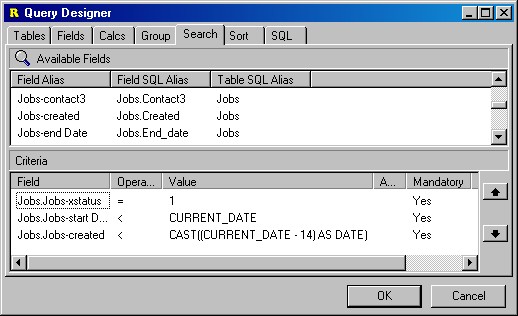
| Step 4. | We now need to set some selection criteria to narrow down the data we want to see. Go back to the Data tab and click on the Search |
|
|
| · | Status: we are only interested in Jobs that are of Quote status. There are 5 status levels in RentalDesk, with values 0..5 mapping to Cancelled, Quote, Provisional, Confirmed, Completed. So from the list of fields in the top table on the Search Tab, double-click on Jobs-xStatus to add it to the list view at the bottom of the form. To focus on Quote status only we need to enter 1 in the Value box (excluding quotes). The operator needs to be set to '= ' (equals sign) so that the query engine know only to retrieve jobs where the value of xStatus=1. We shall also tick Mandatory to tell the report that this is not an optional selection criterion.
|
|
|
| · | Old jobs: you may not have been scrupulous in demoting Quote jobs to Cancelled (although that is what this report can help you to do!); in that case you may just want to exclude all jobs where the start date has already passed, even if it is at Quote status. In that case you need to double-click on Jobs-Start_Date to add it to the list view at bottom of the form. Set the operator to '>' (greater than sign) and in the Value box type 'CURRENT_DATE' (note the case)
|
|
|
| · | Period: you need to decide just how long a period needs to have elapsed before you are interested in seeing the job. You don't want to be chasing a quote for a job in 3 months time if you only took the enquiry a few days ago. But if the job is still at quote status after say, 14 days, then you want it on your lists. In that case you need to double-click on Jobs-Created to add it to the list view at bottom of the form. Set the operator to '<' (greater than sign) and in the Value box type 'CAST((CURRENT_DATE - 14) AS DATE)'.
|
|
|
|
|
|
|
|
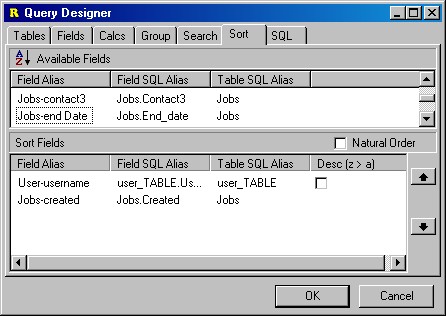
| Step 5. | If you preview your report now you will see that the number of jobs returned is greatly reduced. However, we want to see who the Job Manager for each job is, especially as this defaults to the user who took the booking. We could just add the field, User-Username, but it would be nicer to group the information together by the Job Manager. So go back to the Data Tab and click on the Sort By button |
|
|
|
|
|
| Then say OK to the dialog.
|
|
|
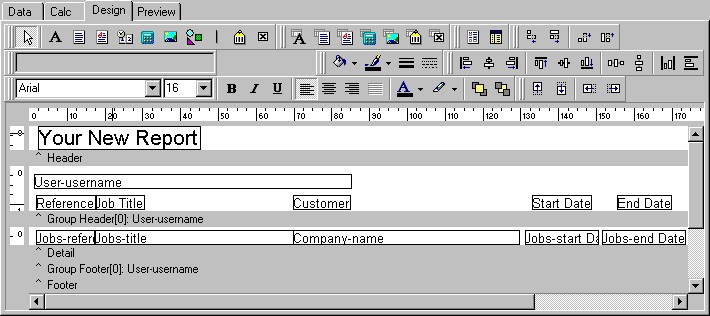
| Step 6. | We now need to add the User-Username field but where do we put it? Even though the data is going to be sorted correctly, if we add the field to the Details Section it will print for every job that prints. It needs to go in it own grouping band which only prints when the data changes, i.e. when a new Job Manager's jobs are printing. So go back to the Design Tab and from the Report Menu select Groups. In the dialog that opens up, select User-Username from the drop down box and click the Add button. There are a few options on this form for controlling how a group behaves, but for now just stick to the defaults. Save OK to the Grouping Dialog and a new group band will be added to the report. Use you mouse to open up the header section and add the field User-Username. Now preview your report.
|
|
|
|
|
| Step 7. | Your report is coming on very well but it lacks one bit of useful information: just how much is the job worth? Some may be more valuable to chase up than others. This information is stored in the table Eqlist_Head that we need to add to the report. So go back to the Data Tab and click on the second toolbar button to add more tables. Select Eqlist_Head and clear the default Joined Fields. We want to "Join Eqlist_Head Table with.." Jobs, and the two fields we select before Adding are Eqlist_Head.xJob and Jobs.Idx. Say OK to the dialog and go to the Fields Tab of the Query Designer. Click the All Fields checkbox in order to add everything in the table to the report. You can now add Eqlist_Head.GrandTotal to the report in the Details Section. If you do this and a job has more than one equipment list then a record will be retrieved for every equipment list on the job, with the effect that the same job information will get repeated on a few lines. This may in fact be desirable, but if you want to just have the total hire value for the job, then you will need to add another group, this time on the field Jobs.Idx, and you can then summarize the field Eqlist_Head.GrandTotal by each job with a DBCalc field (see Working with Subtotals for details on how to do this).
|
|
|