Entering Payments for Invoices
Top  Previous  Next

RentalDesk includes a function that allows you to track the payments received for a job, as well as keep a record of deposits for equipment that have been collected. RentalDesk will also keep a record of cash received for the day. Once the invoice is open access the payments window through the viewdeposit button in the data buttons.

deposit1

Select the Make Payments/Receive Deposits Tab and press the nebutton3 button. Select Your Invoice in the invoice section, and the amount of the invoice will be entered in the window as shown above. Select the payment taken option from the Type menu. You can enter a reference as needed.

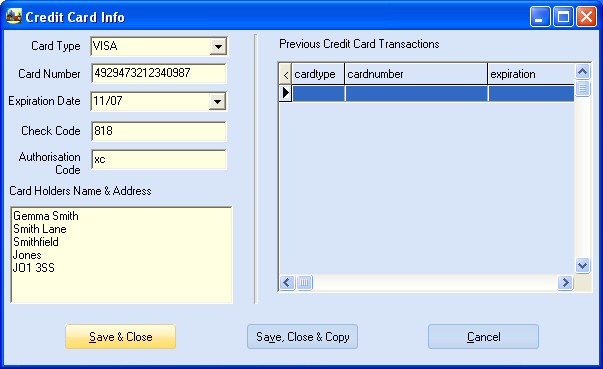
If the customer is paying by credit card, you will need to process the card through your normal credit card processor. RentalDesk will keep a record of the transaction. Press the creditcardbutton button and the credit card payment form will appear.

deposit2

Select the card type, enter the credit card number information as well as the authorization code. It is a good idea to enter the card holder's name and address as well. If you have done business with this card holder before, you can select their name from the list of Previous Credit Card Transactions.

Once the payment information has been entered, press the savebutton2 to save the transaction. Then you will need to mark the invoice as paid by pressing the markselectedaspaid button. If the customer requires a receipt for their payment, press the printreceiptjpg button. Once the receipt previews to the window you will have some choices to make on the format of the form.

printbuttons

PrintThis button will take you to the print dialogue box which will then print the invoice to your printer.  
 
Copy   This button will copy the contents of the invoice to the clipboard, which will allow you to paste the contents into other applications.  
 
E-mail   This button will open the e-mail dialogue which allows you to send the invoice as an attached pdf document or in other formats.  
 
Export   This button will open the document export dialogue box, which will allow to export the contents of the invoice into other formats such as rich text format (rtf), HTML, JPG, Excel, JPG, GIF or BMP.