1. Standard Export options
The data in your reports can be exported to a number of different formats, with PDF and RTF being the most successful at faithfully reproducing the output. Simple click on the Export button on the reporting Action form to popup a form that allows to you to specify the filename, format (file type) and where the file will be saved.
Although Excel is available as a format option, sometimes the transfer of data, particularly if in tabular format, does not always result in 100% alignment of field/columns. If you want to transfer data to Excel so that you can work on it in spreadsheet format you can do this by printing to a CSV file, which a format that Excel readily understands. This is explained below.
2. Advanced Export to CSV and Tab Delimited Text Files
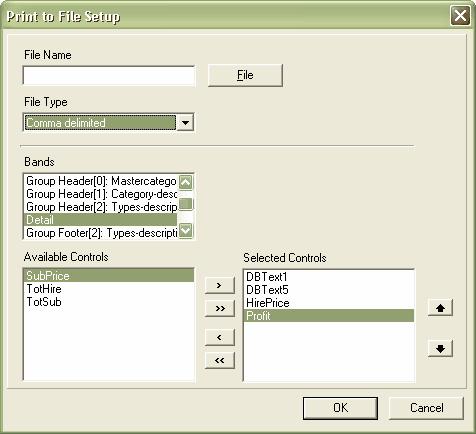
i) Open a report using the Standard Report Designer. From the menu select File | Print To File Setup.
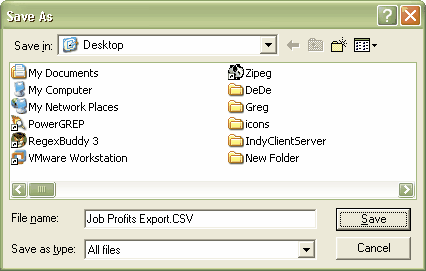
ii) Click the File button in order to select where you want your exported file to be saved and what it will be called; the File Name box itself is read-only. Note: if you want your file to be recognised as a CSV (comma separated values) file then you will need to give it a CSV file extension in its File name and make sure that Save as type is set to All Files.
iii) Select the File Type you require.
iv) Now for each section (band) in the report you are able to select which fields (controls) you want to included in the exported file. This is a useful feature because in a report with lots of sections (header, footer, etc) you might only be interested in the raw data that appears in the Detail section. Save the report.
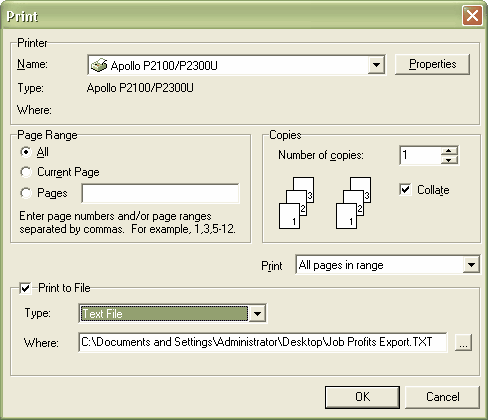
v) Go back to the form in RentalDesk that you normally print this report from and preview it. Select Print and on the print dialog that opens you have a Print to File option at the bottom. Tick this and select Text File from the output options; when you do this the file name and path that you previous defined for the print to file output will be filled in for your. Click OK to export your data.


