Working with Mailing Labels
Top  Previous  Next

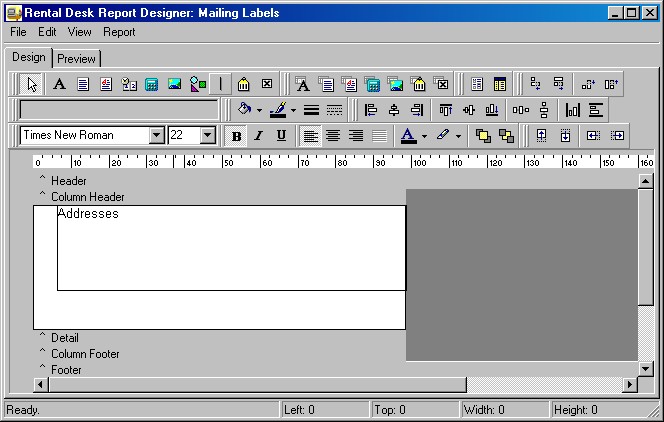
Open the Mailing Label report; you will find it in the Address Book folder.

The report will look a little odd: although its layout has been set to 2 columns the data space consists of only 1. This makes sense because all that happens is that when the report has filled up the first column it just runs onto the next column.

reportlabel3

Click on the Preview tab to see how the report would look. You will notice that each address is surrounded by a box. This is because the Detail band has a Shape Component on it that has its ParentHeight and ParentWidth properties checked (this means it will fill the whole space of the band it is placed in). We will remove the Shape Component when you have got the layout of the report correct; however, at them moment it is very useful because it allows use to see the exact area and position available for each mailing label.

Note: in this report the Memo Component has its "lines" assigned by some of that hidden code we discussed earlier so you don't need to bother doing anything more with it. We just have to set up the margins and layout to match the labels in your stationary cupboard.

UnitsBe sure that your report is using the correct measuring units for you. By default they are in millimetres, but you can easily change to inches from the Report menu.  
 
MarginsLook at your sheet of labels. Do they start right at the top of the sheet? If so set the report's Top Margin to 0; if not, then measure it (or check any specifications you have on the labels) and set the correct value. Do the same for the other 3 sides / margins  
 
GapsSome labels have a gap between the bottom of a label and the top of the next one below it. On the Layout tab of the Page Setup form, adjust the Row Spacing accordingly.  
 
ColumnsHow many columns of labels does your sheet have? Again set this in the Layout tab.  
 
Column Positions and widthsYou should not need to adjust these as they pick up their defaults from the number of columns and the left page margin.  
 
Column traversalThis just determines whether the data prints down one column first before moving on to the next column, or across the columns first.  

Now Preview the report. Does it look OK? Do you need to move the Memo Component about a little so that it sits nicely inside the label space? Once you get that right, print the report so that you can overlay it on your actual labels sheet. The outline of the Shape component should help you check that the match is correct. If it isn't, so back to the Design tab and make some minor adjustments to the Page Setup.

When you are happy with the report you can delete the Shape Component and then Save and close the Designer. Then open the Configuration form for the report and go to the Filters tab. The Show All option is checked. This is has been useful while you have been designing the report; however, now you will want the report to respond to any filters that are active in the Address Book when you print. For example you may have set up a filter called "Send Xmas card" and assigned it to your top 100 customers out of a database of 1000. If you set this filter then you want your mailing label to print only for these 100 customers. By removing the Show All option it will do exactly that.