Before you can add users to HireTrack NX, you need to set up Features Collections, or User Profiles which sets the access to areas of the program. When you create a new user you can later select which areas of the program people have access to by giving them rights to one or more collections. Each user can have multiple feature sets applied to them so you can divide the program into a feature set that deals with Accounts access, one that deals with Inventory access and then assign the user both feature sets to allow Inventory and Accounts access.
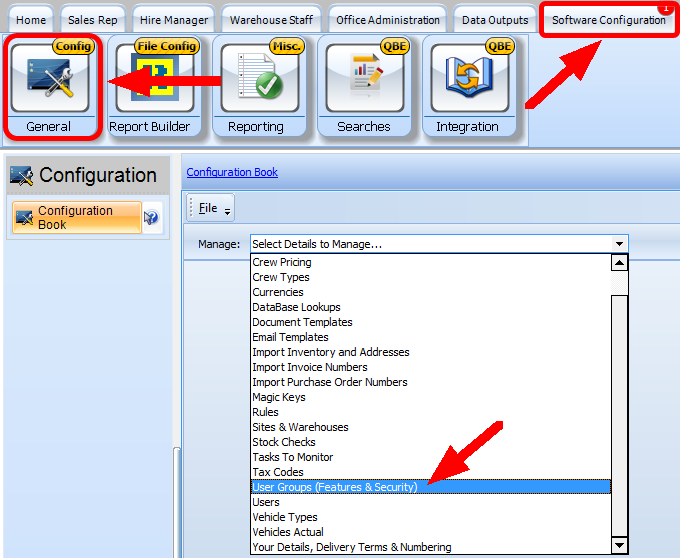
Go to the Software Configuration>General> User Groups (Features and Security)
In the Feature Collections panel on the left of your screen, select the Click here to add a new Collection and enter a name for the group and then press the ![]() key.
key.
You may choose to set the feature collections based on job responsibilities such as:
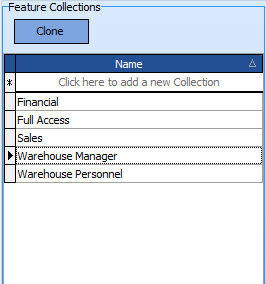
Or, you may also create a feature selection based on access to different parts of the program. The users can then be assigned to multiple feature collections.
An example:
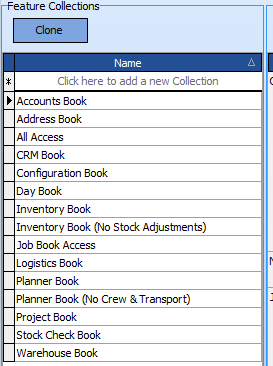
Reselect select the feature collection you wish to edit on the left hand side and on the right hand side select which features the collection profile will have access:
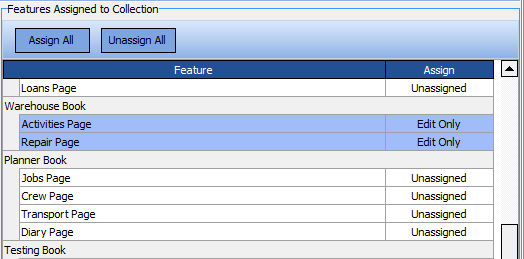
For each page of each Book and for each area of functionality you can select between:
| • | Create: Users in this group have full control and may create/edit and delete new records. |
| • | Edit Only : Users in this group can view and edit existing information, but cannot create new records. Note: The Edit Only Rights are currently only implemented for the Inventory and Address Books. |
| • | Read only: Users in this group can only view information and not change any information Note: The Read Only Rights are currently only implemented for the Inventory and Address Books. |
| • | Unassigned: Users in this group cannot access any information. However they may be given access if they have been allocated to another Feature Collection that does allow access. |
The Assign All button will set all of the assigned features to CREATE which will give users in this group full Read, Write and Create access to all the functionality and individual parts of the program. This setting can then be changed to restrict access to specific features. This is useful for users who have general access and you only wish to limit their access to a few features
The Unassign All button will set all of the assigned features to UNASSIGNED. This is useful for users who will have very limited access and so only specific areas of the program - for example in the example in the image above the Warehouse Book and repairs can be then individually set to the desired access level.
In the event you have several groups of feature collections with similar access rights, you can create the first collection, set the user rights the first group and once saved, you can then clone those settings using the Clone button
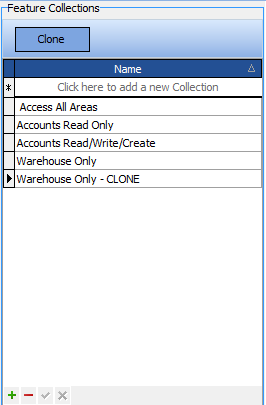
And then make the changes required for the new cloned group and then rename it to a new group name by over-typing the existing name.
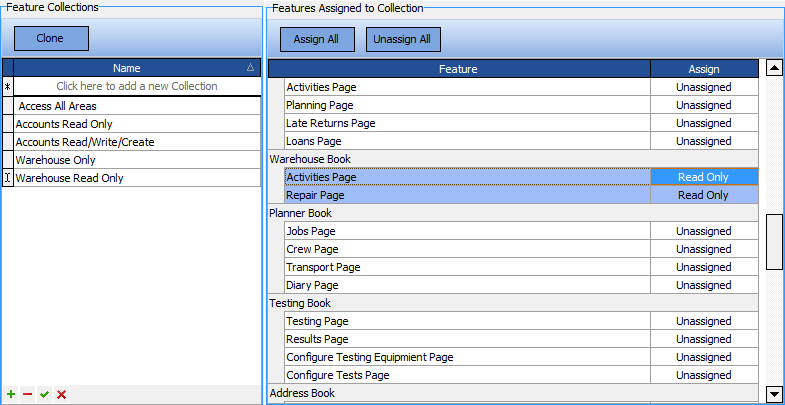
Once you have set the features required press the Save (tick) button ![]() at the bottom left.
at the bottom left.