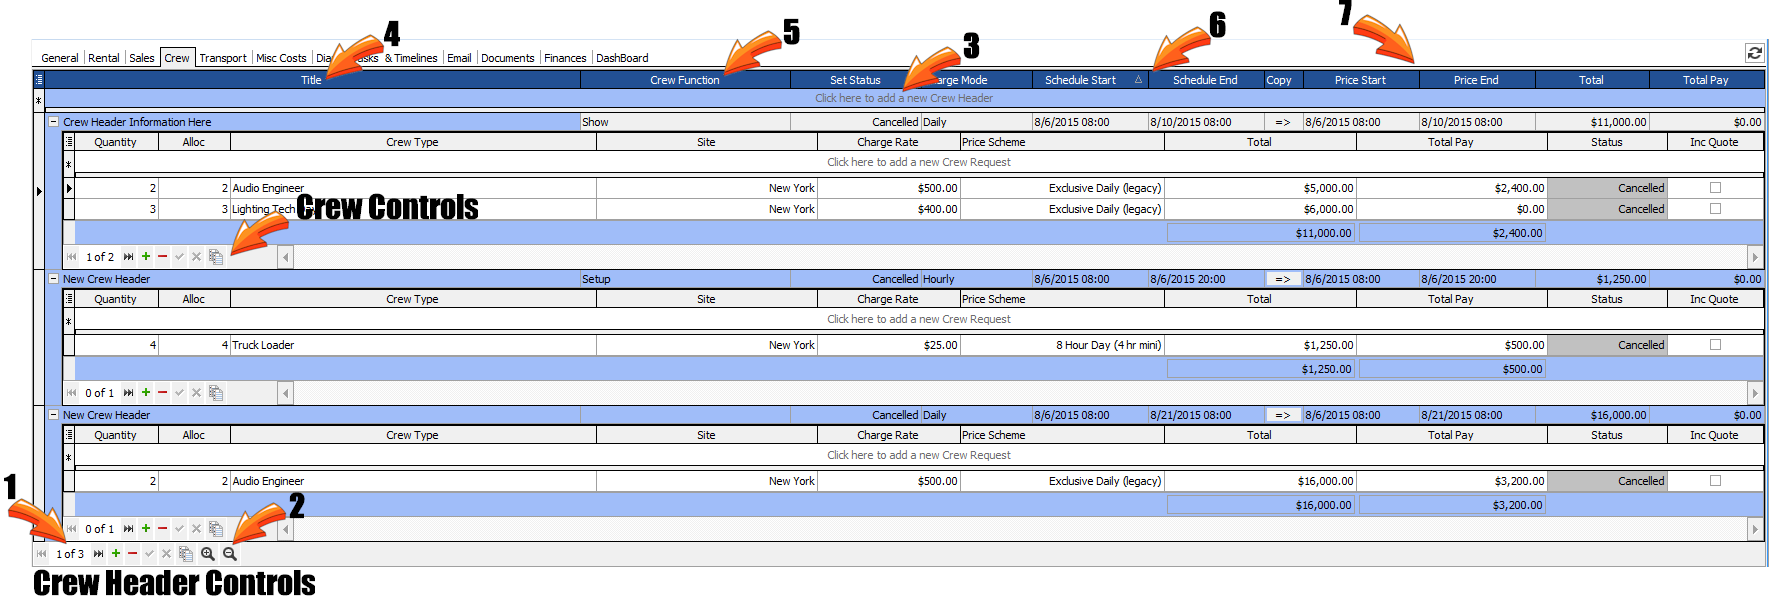
The Crew Tab of the Job Book is used to request crew positions for the selected job. The allocation of actual people typically comes later and the allocations may be performed from this tab if access to the Crew Planner is granted to the user. Each crew request or "call" is separated by a Crew Header, which allows several positions to be grouped within the Crew Header. The active header which is editable, is defined by the header line turning orange.

All Crew Headers are accessible, although the number of Crew Headers that are displayed will be determined by the size of your screen and the amount of available space.
| 1. | To aid in navigation, the selected Crew Header number and the total number of Crew Headers is displayed in the bottom left corner of the grid. |
| 2. | There is a collapse/expand headers button located in the Header controls |
| 3. | Upon accessing the Crew Tab, there are no Headers. To create the new Header information, press the 'Click here to add a new Crew Header' line or the |
| 4. | Enter a Header Title that is relevant to the crew positions. |
| 5. | Select a Crew Function from the drop down window if needed. The Crew Functions are setup using the Configuration Tab. Typical use of the Crew Functions are get in Crew, show Crew and de-rig Crew. The Status of the Crew Header will Default to the status of the job, however, this status can be changed. |
| 6. | The scheduled dates determine the availability of the person to be allocated at a later date. |
| 7. | The "Price start" and the "Price end" dates determine the total cost of the position. In most cases, these dates will be identical, however, the facility is provided in the event that you need to calculate pricing separately from the scheduled dates. Should you make changes in the scheduled dates and wish to copy the information to the Pricing Dates, press the => copy button and the dates will be copied. |

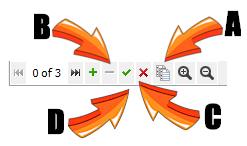
| A. | To duplicate an existing Crew Header with all the Crew Line requests, press the clone button on the Crew Header Controls. |
| B. | To delete a Crew Header use the - button on the Crew Header Controls |
| C. | To cancel editing of a crew line, press the red X button |
| D. | To confirm the editing of a crew line, press the Green Check Mark. |
Once the Header is created, press the down arrow on your keyboard or select the ![]() from the Crew Controls Panel.
from the Crew Controls Panel.
This will create a new line for you to enter the Crew you want.

| 1. | Enter a quantity requested for the Crew Type |
| 2. | Select the Crew Type using the search window |
| 3. | The Site should default to the site selected for the job, but may be changed to schedule crew from a separate site. |
| 4. | A default Charge Rate and Price Scheme will automatically populate for the request, however this can be edited. The default charge rates are configured for the crew type on the Configuration Tab, The default price scheme is configured for the crew type on the Configuration Tab. |
| 5. | The charge rate may be toggled between calculating a daily rate or an hourly rate depending on the Charge Mode selected in the header. |
| 6. | The combination of the Price Start/Price End and the Charge Mode selecting the Charge Rate and the Price Scheme will determine the Total which is what the customer will be expected to pay for that crew position. |

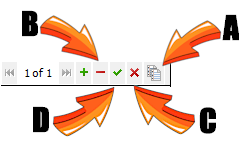
| A. | To duplicate a Crew Line press the clone crew button which is the last button of the Crew Controls Panel. |
| B. | To delete a single Crew Line, press the - button |
| C. | To cancel editing of a crew line, press the red X button |
| D. | To confirm the editing of a crew line, press the Green Check Mark. |
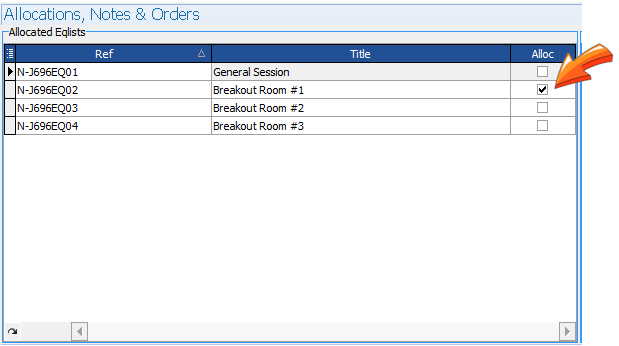
Allocate Crew Positions to Specific Equipment Lists
You may allocate specific crew positions to specific equipment lists. This make planning easier when a specific person can see that they have been assigned to a group of equipment.

In the upper grid, select a specific crew type (no person needs to be allocated), and then check the Alloc box of whichever equipment list you decide.
Crew Notes
Each request for crew types includes a Notes field, which is located in the right lower corner of the crew tab. Select a specific crew type and the notes will appear and ready for editing.
