|
Sending out and returning equipment |
  
|
|
Sending out and returning equipment |
|
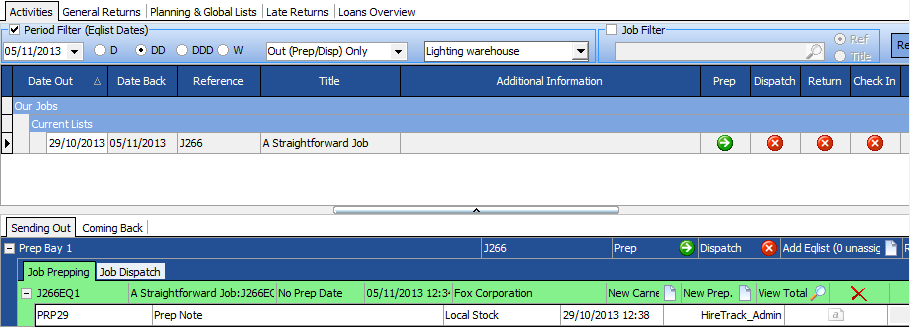
Here in the activities book we have one job that needs sending out - the status indicators are showing all red crosses so we can see nothing has been done on the job yet.
There are many shortcuts if you wish to take them - this is a step by step guide of the full method of performing these functions.
(on the equipment list itself you can use the edit>quick prep and dispatch option to skip all these steps and simply send out the items or in the rules section you can make the system use one step prep and dispatch so only prepping is necessary and the dispatch is handled automatically)
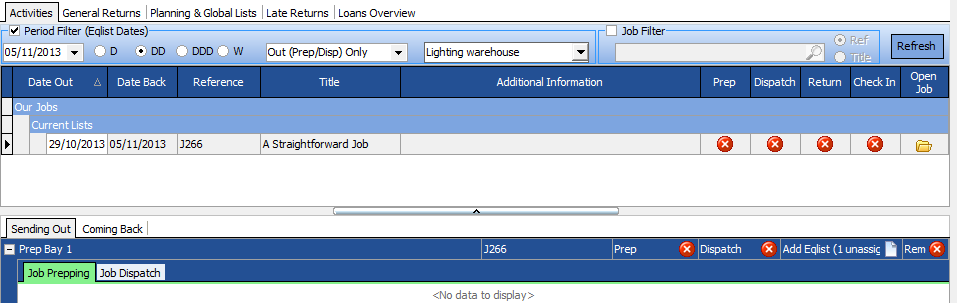
In the lower part of the grid we can see that there is one unassigned equipment list that has not been put in a prep bay
Allocate the job to a prep bay
Click on the 'Add Eqlist' icon

A dialog appears asking you to select which equipment list(s) you wish to put in the prep bay.
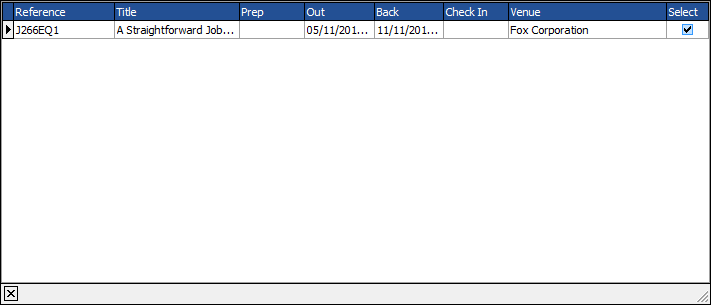
put a check mark in the 'Select' box to select the list(s) you wish to have in the prep bay and close the window
The activities display then shows - indicating that J266EQ1 is now in prep bay 1 and it has not been prepped or dispatched

Creating a prep note
Next we want to ate a prep note so we select the new prep icon against the list

A pop up menu will appear asking what type of prep note you want - as this is only using local equipment only the local equipment option is offered
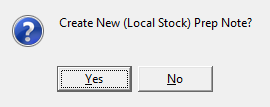
The system prompts to check you want to create a new prep note ( if you are prepping in several sessions you can opt to open the existing prep note instead).
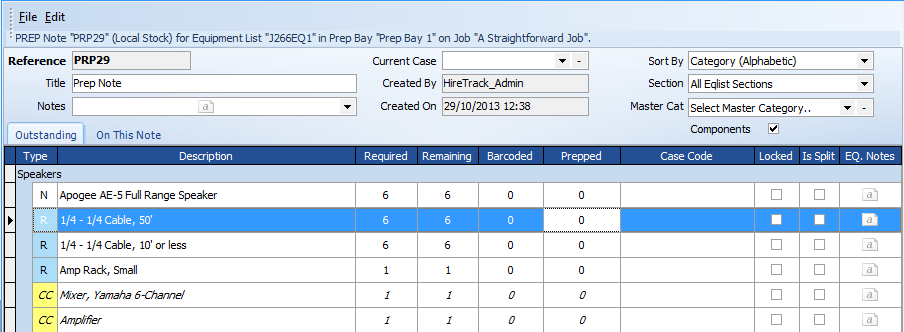
There are various controls on the top of the prep list to change how items are displayed - to change the sort order or only to display one section of an equipment list if it has multiple sections.
There is also a check box to display whether parts of composites are displayed. In this example we have chosen to display composite components so the parts making up the small amp rack are displayed with a yellow ' CC' square next to them.
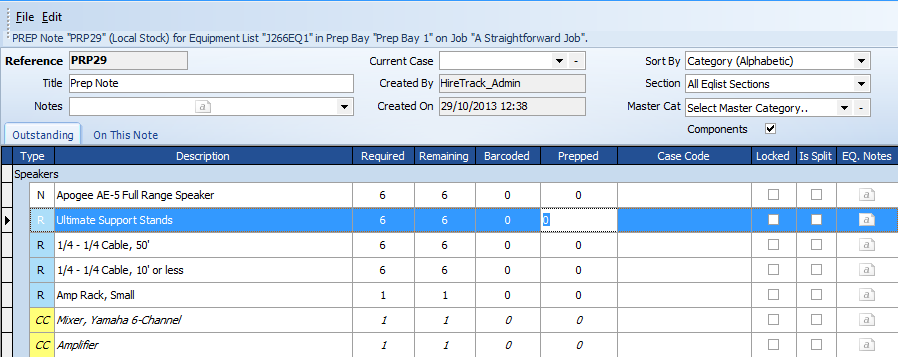
by default we are on the 'Outstanding' tab this shows the equipment that still needs to be prepped.
At this stage we can either scan using an attached barcode scanner, type the barcode or typecode into the barcode area or type directly in the prepped column. If you press 6 then enter in the prepped column for the 'ultimate support stands' the system will remove them from the outstanding ( waiting to be prepped) tab

the 'auto add' function will automatically add to the list any equipment that is scanned but was not originally on the list. Whether this function is enabled depends on the users rights defined in the users right collections that they have been assigned
we continue to prep items using counted items , scanned or typed barcodes until all the equipment is processed - or we can use the 'process all' button.
Once the prep note is complete we see the activities page status indicators now shows the prep has been completed
Dispatching the equipment
This is very similar to using the prep note.
change to the Job dispatch tab on the lower grid

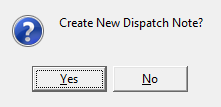
press the New Dispatch note button.

the system will ask you to confirm you wish to create a new dispatch note
In most cases the equipment will be taken from the prep area (bay) and put straight on the truck. Since any barcoded equipment will have been recorded on the prep note, all the information required will be by default carried across to the dispatch note so we are safe to use the process all button on the dispatch note
Once the list is closed we can see the status indicators now show the job has been prepped and dispatched.
Receiving the equipment back
This is simply a reverse of the scanning out
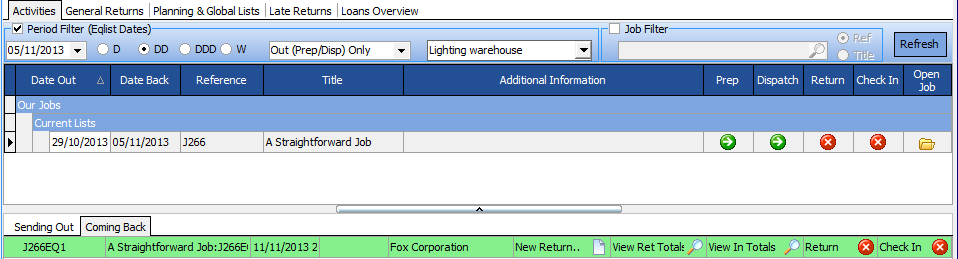
| • | Change the lower tab to the 'Coming back tab' |
| • | press the New Return icon. |
| • | Scan or type the barcodes or simply count the types in |
| • | Close the return note |
The status indicators show that the return is complete, the final stage is to check the equipment back into stock to make it available again.
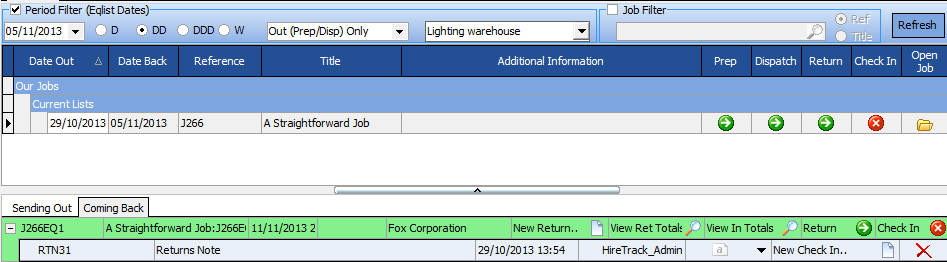
Putting Equipment back into stock
| • | press the 'New Check in' icon. |
| • | Scan or type the barcodes or simply count the types in or use process all |
| • | Close the return note |
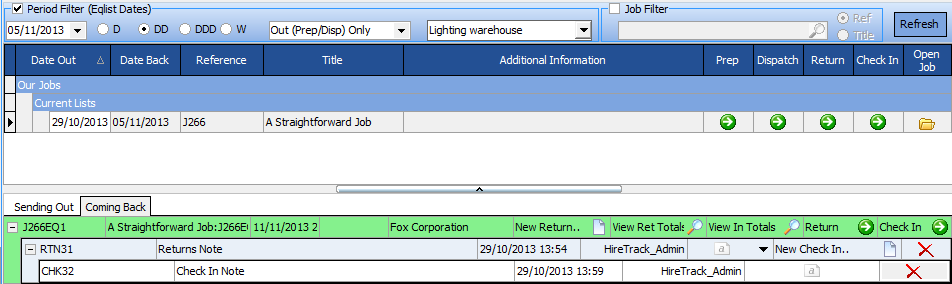
The status indicators now show the job as completed
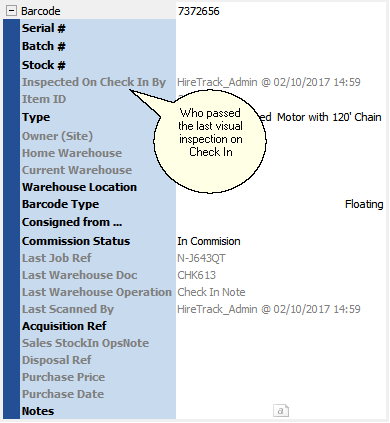
Check In notes have a Visual Inspection Pass option. This is to allow users to positively signify that items they have scanned passed a Visual Inspection. There are three modes for the Visual Inspection:
| • | OFF |
| • | NEXT SCAN ONLY - will only set the Inspected and passed flag in the database for the following (single) scan. |
| • | ALL SCANS - will set the Inspected and passed flag in the database for every scan. |
The Items page of the Inventory Book allows you to see who did Visual Inspections and when: