|
Working with Carnets |
  
|
|
Working with Carnets |
|
Many times companies will use a customs broker to handle the myriad of paperwork required to cross borders. Typically, the information must be provided days, weeks or even months in advance in which you are informing the country which equipment you are bringing across the border and more importantly... that you're bringing it back and not leaving it! A Carnet or ATA Carnet (pronounced kar-nay) is an international customs and temporary export-import document. It is used to clear customs in 87 countries and territories without paying duties and import taxes on merchandise that will be re-exported. Carnets are also known as Merchandise Passports or Passports for Goods. While HireTrack does not technically create the actual carnet form, it does produce the manifest or list of equipment which is attached to the carnet form, and for our purposes we shall call these documents the carnet and reference the carnet functions of HireTrack NX. There is 1 carnet per equipment list. The carnet in this situation is much like a "pre-pack" list in that you can scan or select specific barcodes and you can enter quantities of each type of equipment. You can also place the equipment in specific road cases which is recommended for the document that is created so customs can get a "box list" of what is in each case. Most times, what customs is looking for is how many cases you're bringing in, and each case should be numbered 1 through whatever.
Create a Carnet
The carnet is accessed from the Carnet Reserved Tab in the Equipment List Header behind the General Tab.
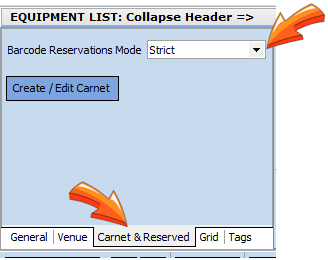
The Barcode Reservation selects 1 of 3 reservation modes for the barcodes that will added to the carnet.
| • | Strict - Whichever barcode you add to this carnet will restrict the user if they scan this barcode on any other equipment list which overlaps dates with the source equipment list. |
| • | Prompt - Whichever barcode you add to this carnet will prompt the user if they scan this barcode on any other equipment list which overlaps dates with the source equipment list. |
| • | Relaxed - Whichever barcode you add to this carnet will allow the user if they scan this barcode on any other equipment list which overlaps dates with the source equipment list. |
Click the Create / Edit Carnet button to create a new carnet.
The Carnet is broken into 3 sections from Top to Bottom

Field Name |
|||||||
Ref |
This is the document number generated by HireTrack NX. |
||||||
Eq Ref |
The Equipment List Reference Number to which this carnet is attached. |
||||||
Job |
The Job Number. |
||||||
Carnet |
The official carnet document to which this manifest is attached. |
||||||
Eq Title |
The Equipment List Title to which this carnet is attached. |
||||||
Title |
And editable field for users to individually identify this carnet. |
||||||
Notes |
Notes field specific to this carnet. |
||||||
Eq Notes |
The Equipment List Notes (1) to which this carnet is attached. |
||||||
Carnet Out of Sync Log |
After selecting either Strict or Prompt mode on the Equipment List Header. Should the barcodes that have reserved on the carnet note have been used elsewhere during the equipment list periods, the carnet is considered "invalid". A log of the barcodes will be provided here. |
||||||
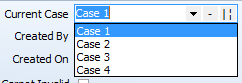
Current Case
|
A field to enter the Case ID which will be applied to each line of equipment in the equipment grid when it is allocated. There are 3 functions available.
|
||||||
Created By |
The user name of the creator of this operations note. |
||||||
Created On |
Date and Time this operations note was created. |
||||||
Carnet Invalid |
After selecting either Strict or Prompt mode on the Equipment List Header. Should the barcodes that have reserved on the carnet note have been used elsewhere during the equipment list periods, the carnet is considered "invalid" and this box will be selected. |
||||||
Sort By |
Select the sorting order of the operations note. The choices are:
|
||||||
Section |
This filter allows you to display only the equipment types in a single section. |
||||||
Master Cat |
This filter allows you to display only the equipment types of a single master category. |
||||||
Components |
Un-selecting this box will hide all the components of all the composites. |
||||||
Show Locked Lines |
Displays any locked lines (typically splits) on the Outstanding tab. |
||||||
Refresh
|
Press this button to refresh the operations notes. This will update your screen with any updates from other users working on the same equipment list. |
||||||
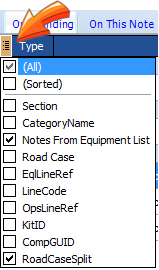
Custom
|
Allows the user to customize the columns they wish displayed by clicking the custom button and then selecting from the Grid Options the fields the user wishes to be displayed. These columns may then be dragged/dropped into any column order the user wishes. Once the custom button is unselected, the grid will revert back to the default settings. |
Columns |
|||||||||||||||||
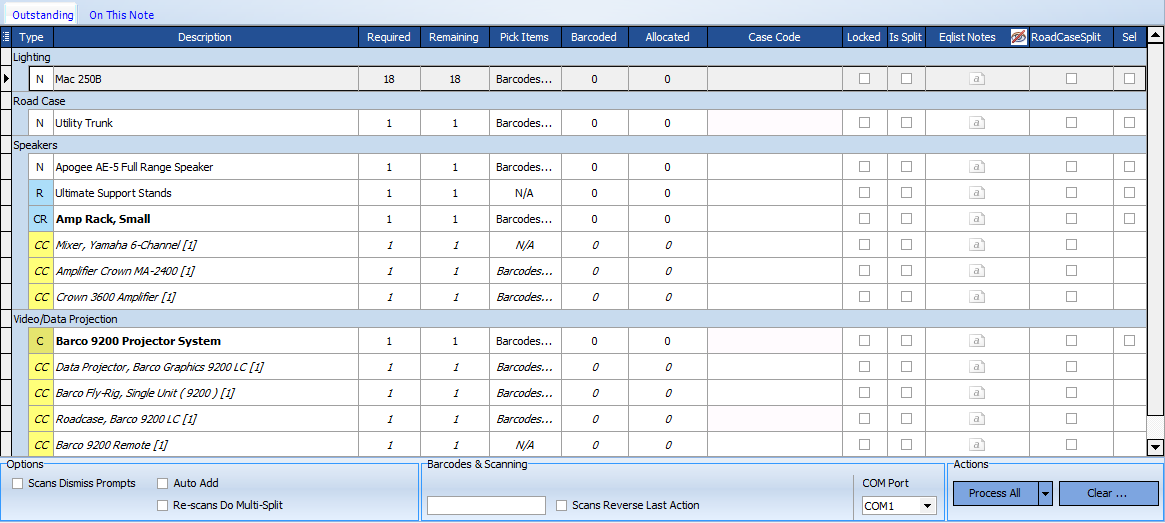
Record Type |
Displays the type of equipment and it's relation to this equipment list.
|
||||||||||||||||
Description |
The Description of the Equipment Type. |
||||||||||||||||
Required |
The number required for the equipment list. |
||||||||||||||||
Remaining |
The number remaining to select or allocate |
||||||||||||||||
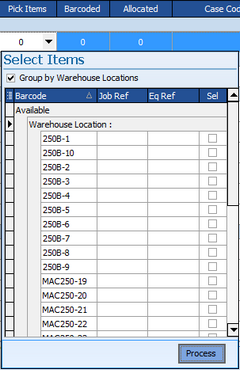
Pick Items
|
Since you may not have the ability to scan specific barcodes, the pick items window allows you select and process all the barcode you anticipate will be sent on this manifest. |
||||||||||||||||
Barcoded |
Displays a list of all the barcodes that have been selected. |
||||||||||||||||
Allocated |
An integer field in which you enter the quantity you wish to place on this manifest. |
||||||||||||||||
Case Code |
Identifies the case which this equipment has been placed. You must enter the case ID in the Current Case field in the header, and then either allocate a quantity, scan a barcode or select from the drop down menu. |
||||||||||||||||
Locked |
Indicates the line has been locked to prevent further edits. Most lines that are split are locked. |
||||||||||||||||
Is Split |
This checkbox indicates the line has been split by quantity from another line. An operations note may be split into multiple lines in the event the total quantity will be split between several different cases. Perhaps you have an order that requires 18 lighting fixtures, and 6 will go in case 1, 6 in case 2, and 6 in case 3. You would either scan or select the road in the Current Case Field, and then scan your 6 lights into case 1. You would then split the line by clicking on the description and pressing the SPLIT icon:
This will split the line and change the quantity required:
You can then repeat the steps for the next 6 lights and so on. |
||||||||||||||||
Eqlist Notes |
Displays the Equipment List Notes. Click to open, or press the eyeball to display the notes. |
||||||||||||||||
Road Case Split |
Indicates the lines have been split as the result of a type being a case, or a component of a composite is a road case |
||||||||||||||||
Sel |
Short for "Select". Allows you to select multiple lines and perform specific functions. |
Options |
|||||||
Scans Dismisses Prompts |
Use this function to allow you to re-scan a barcode, which will dismiss any error prompts on your screen. This allows the user to proceed without needing to return to the keyboard to advance. |
||||||
Relaxed Item Locations |
Select the level of discipline required for scanning barcodes whose home warehouse is a different warehouse than the scanning warehouse. There are 3 options available:
|
||||||
Auto Add |
Select this box if you wish to bypass the prompt window of adding a type which is not required on an order. Some users will create a blank list, and then open an ops note and scan barcodes onto the order. |
||||||
Re-Scans Do Multi-Split |
After selecting this option the user can scan barcodes or allocate equipment to a road case, the user can scan the road case a second time, and all the lines that have been assigned to that case will split. This allows the user to then scan another road case, and continue scanning kit into that road case. |
Barcodes & Scanning |
|
Scans Pending |
Depending on which operations note you have open, this will provide a list of barcodes which are ready to be processed. A carnet will never have barcodes pending |
Barcode field |
Manually enter your barcode or typecode here as required. |
Scan Reverse Last Action |
Select this if you have scanned something in error and wish to remove it from the operations note. |
COM Port |
Select the COM Port which your scanner is connected if using a COM Port. |
Actions |
|||||||||||
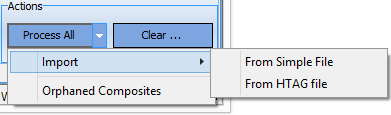
Process All |
Press this box if you wish to process the entire list of equipment in a single click. All remaining equipment will be considered processed and the operations note is complete. There is an option here if needed:
If using a data collection style scanner, you can import your barcodes from a text (.txt) file by selecting the import option.
Orphaned Composites can be selected in the very unusual event that a composite component did not process with it's parent composite. |
||||||||||
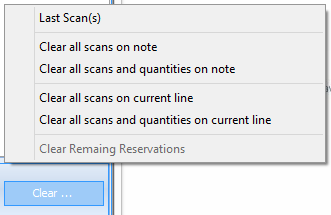
Clear |
There are a variety of options available when selecting the clear button:
|
The Menu Selections allow the user to complete specific tasks related to the operations Note

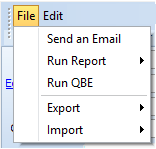
File Menu
|
|||||||
Send an Email |
Opens the email editor and allows the user to send an email from within HireTrack. This email is then stored on the Email tab of the Job Book. See Email for more information |
||||||
Run Report > |
A selectable list of reports is displayed from which the user may select and print/export or email. |
||||||
Run QBE |
A selectable list of database queries can be run from this menu and then either export or print. |
||||||
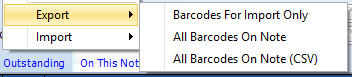
Export > |
The Export functions create a text file and there are 3 options.
|
||||||
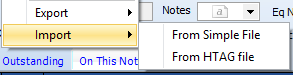
Import > |
The Import Functions allow importing barcodes to a text file or a HireTag RFID File. |
Edit Menu
|
|
Open Equipment List (F4)> |
An existing purchase order to the supplier may be APPENDED (not amended) by using this menu selection, and then select a purchase order from the list of PO's to that supplier. |
Refresh (F5) |
Refreshes the Operations Note |
Copy Barcodes |
Copies the barcodes on the note to your clipboard |
Paste Barcodes |
Pastes Barcodes that have been copied to your clipboard |
Orphaned Composites |
Orphaned Composites can be selected in the very unusual event that a composite component did not process with it's parent composite. |
Debug |
Function used by technical support team. |